How to Get Air Out of the Water Lines
You may notice air disrupting your water lines and causing inconsistent flow. With a few simple adjustments, you can correct the issue and restore reliable water pressure throughout your pipes.
You may flush your system or bleed your valves to eliminate trapped air. These methods ensure efficient operations and lower risk of water hammer disrupting your plumbing system for efficiency.
For expert tips and further assistance, check out Instagram. They share real-life examples and guidance that empower you to tackle your plumbing challenges with confidence, ensuring guaranteed long-term satisfaction.
Identify Air Blockage
This section explains how you can recognize air blockage in your water lines using expert tips and straightforward advice that simplifies troubleshooting in your home plumbing system.
Begin by familiarizing yourself with common symptoms and causes while preparing to take action on eliminating air from your water lines. Following are essential points to guide you through the process.
- Auditory Signs: A hiss, pop, or persistent gurgling noise signals air trapped within the pipes, indicating a need for further investigation.
- Other Sounds: Consistent thumps, tapping, or hammering noises occur when air disrupts water flow, affecting everyday activities.
- Causes Noted: New pipe installations, neighborhood construction, repeating heating cycles, corroded water heater parts, and temporary water service interruptions often introduce air.
- Flow Impediments: Air pockets can reduce water pressure so that faucets feel weak and inconsistent when turned on.
- Structural Concerns: In extreme cases, trapped air may eventually lead to pipe corrosion, compromising the safety and durability of your plumbing system.
Understanding these points can help you quickly diagnose air blockage and prepare to remove it while ensuring your plumbing system remains efficient and safe for daily use.
Locate Valve Points
This section provides clear methods to locate the main water shutoff valve, an essential first step ensuring you can control water flow when addressing air or leak issues in your plumbing system.
Main Water Line
Start by determining the water line’s entry point at the street level; the simplest path usually leads directly to the main shutoff valve near the water meter.
Tracking Visible Water Lines
Follow the incoming cold water line attached to either the water heater or another central fixture, which typically connects to the main water line in a visible, accessible area.
Exterior and Special Locations
Check exterior walls or yard chambers in warmer climates; these access points may house your main water shutoff valve. For specialized setups like well systems, trace the pipe from the wellhead to the pressure tank.
Additional guidance can be found in resources like this DIY advice for more detailed methods of locating your valve. Doing so ensures you can quickly shut off the water in an emergency.
Shut Off Supply
In this section, you learn how to safely shut off your water supply by understanding different types of valves and following essential steps to avoid further complications during maintenance.
Before beginning repairs, it is crucial to secure your plumbing system by closing the main valve. Key tips and valve types to consider are outlined below.
- Ball Valve: It uses a rotary ball design with a center hole for quick water shutoff, ideal for both indoor and outdoor applications.
- Gate Valve: It operates with a wheel handle to lift or lower a metal gate, often found in homes with older systems and requiring occasional use.
- Multi-Turn Angle Valve: It controls water flow to fixtures individually, allowing maintenance without affecting the entire home’s system.
- Pressure-Reducing Valve: It regulates water pressure using a spring and diaphragm, safeguarding pipes and appliances from high pressure.
- Proper Shut Off: Locate the main shutoff valve, and turn it clockwise. Ensure safety by checking for standing water and de-energizing nearby appliances.
Following these steps ensures you safely isolate your home’s water supply and minimize risks while you repair or conduct maintenance on your plumbing system.
Vent Faucets Slowly
This section focuses on techniques for venting faucets slowly to release trapped air and improve water flow, ensuring that your plumbing system returns to efficient operation with minimal disruption.
Identifying Bends and Kinks
Inspect your piping for any sharp bends or kinks that may restrict water flow, as these obstacles often trap air and reduce water pressure gradually.
Venting Techniques
Begin venting by gradually opening your faucets, allowing air to escape slowly. Avoid sudden full-force openings that might worsen the problem temporarily.
Pressure Regulator Checks
Review your pressure regulator settings to ensure they are properly configured; improper regulation may lead to low water pressure contributing to trapped air in the lines.
Careful venting reestablishes consistent water flow, letting your water heater and fixtures perform optimally without interference from stray air bubbles.
Restart the Flow
This section provides guidance to restart water flow after maintenance, ensuring that water pressure and distribution normalize with clear and consistent output throughout the plumbing system.
After removing air and shutting off the supply, restarting the flow is essential. Follow these detailed recommendations to help restore water pressure safely.
- Optimal Pressure Range: It is crucial to maintain water pressure between 40 and 60 psi for proper functioning of your appliances and fixtures.
- Unblocking Clogs: It may be necessary to clear clogs from faucets, showerheads, and aerators to help reestablish a smooth flow.
- Leak Inspection: Check for leaks or partially closed valves that might be contributing to reduced water pressure during restart.
- Pressure Regulators: Adjust your pressure regulator if water pressure is off, but take care not to set it too high to avoid system damage.
- Gradual Restoration: Open faucets slowly to let air bleed from the pipes, ensuring a steady stream of water without abrupt changes in flow.
When you gradually restart your water supply and monitor for consistent pressure, it minimizes the risk of shock to your plumbing system and ensures lasting performance.
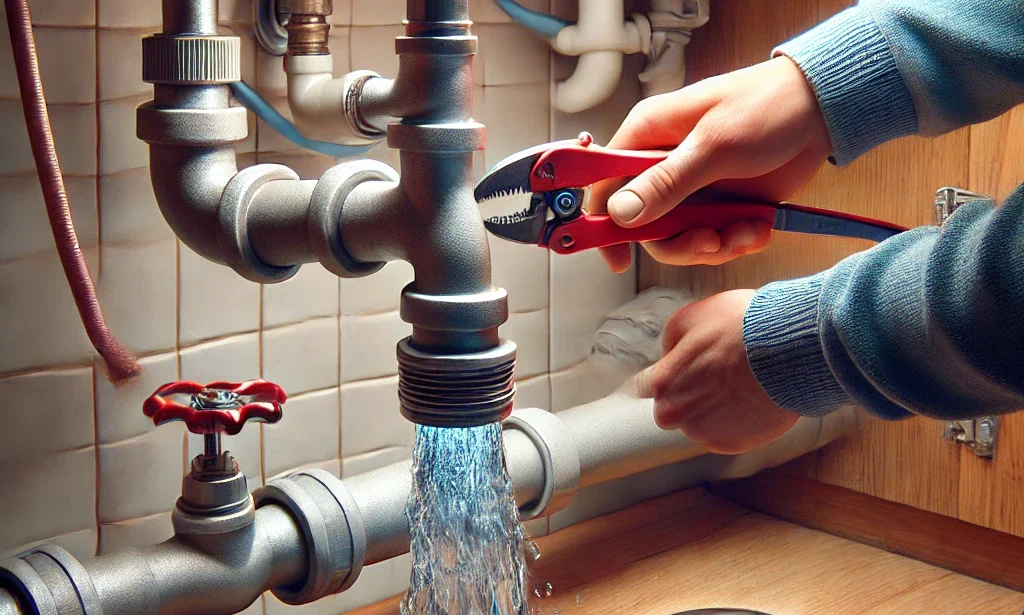
Flush Out Air
This section details essential techniques to flush out trapped air from your water lines. Utilizing proper methods will help improve water quality and pressure throughout your home.
Identify the Problem
Recognize signs of air entrapment, such as sputtering faucets, low pressure, and noisy pipes, which indicate that air is interfering with normal water flow.
Locate the Air Valve
Search for air valves near high points in your system, especially around the water heater or at faucets and hose bibs, to allow targeted bleeding of air.
Bleed the Air
Turn off the main water supply, open faucets and relief valves slowly, and let the trapped air escape. Maintain a container underneath to catch any spill-over water.
Verify Resolution
After bleeding the air, examine each fixture for steady water flow without interruptions. It may require more than one attempt to ensure full removal of air.
Following this structured bleeding process helps maintain consistent water pressure and minimizes the likelihood of recurring air blockage issues in your plumbing system.
Check System Pressure
This section explains the importance of regularly checking water pressure at home. Monitoring your plumbing system guarantees that both high and low pressures are promptly addressed for optimal performance.
Consistent testing is key to preventing damage; you can use a simple pressure gauge to assess and confirm that your water flow remains within the ideal range.
- Obtain a Gauge: Use a pressure gauge with a reliable seal capable of measuring up to 300 psi to observe your home’s water pressure accurately.
- Attach Properly: Screw the gauge onto your outdoor faucet or connection point and tighten it, ensuring an airtight setup for accurate readings.
- Measure Pressure: Open the faucet fully. When the gauge stabilizes, check if the pressure falls between the recommended 45 and 55 psi.
- Adjust and Adapt: For high pressure, a pressure regulator may be necessary; low pressure might require inspection of fixtures or even installation of a pressure booster.
- Regular Testing: Incorporate pressure testing into your periodic home maintenance schedule to catch issues before they escalate into damaging problems.
Consistently monitoring water pressure, with practical tips and tools available from experts like this guide, helps maintain your plumbing system’s longevity and efficiency in everyday use.
Repeat Bleeding Process
This final section discusses repeating the bleeding process if necessary. It emphasizes the importance of persistence and careful observation when addressing trapped air in the plumbing system.
Initial Steps
Begin by turning off your main water supply to prevent interference while you observe significant signs of trapped air throughout your pipes.
Opening Faucets
Open every faucet gradually, starting from the one nearest the shutoff valve and working your way through the house, ensuring that all trapped air is released carefully.
Resupply Water
Once the faucets release air, reopen the main valve slowly. Let water flow and run through fixtures like dishwashers and washing machines for proper refilling.
Repeat If Necessary
If air persists after the initial procedure, repeat the entire bleeding process. This repetition often guarantees the clearance of all air pockets causing low water pressure.
Professional Help
Seek professional plumbing assistance if repeated attempts fail; contacting experts can uncover hidden issues in your complex plumbing systems with certainty.
By persistently repeating the bleeding process and following each careful step, you ensure that your water system is free from air entrapment, maintaining reliable performance and improved water quality.
Clear Flow Ahead
You’ve now completed the process to remove unwanted air from your water lines. Your system should be running more smoothly and with improved pressure. If problems persist or you need expert advice, visit Ferguson Plumbing Wisdom for additional guidance. Enjoy cleaner, consistent water flow today and now ensure enduring efficiency.